We all know that here in Perth, water is an especially precious resource.
As gardeners, and for all our clients who love their gardens, it’s essential for us to create and maintain beautiful gardens while being mindful of water conservation and doing what we can to make our gardens as waterwise as possible.
By using waterwise practices, we can significantly reduce water usage without compromising the health and care of our plants, gardens and lawns. In this blog, we’ll share some of our top tips for maintaining a waterwise garden in Perth, focusing on methods that help retain moisture, minimize evaporation, and maximize the efficiency of watering.
Because we all want our gardens, and Perth, to stay healthy, green and beautiful – it’s up to all of us to do our part!
There are of course, two aspects to a truly waterwise garden; one is creating a waterwise garden from the beginning, for a design, plant choices and reticulation system that will provide the best waterwise result. The second aspect, which is where we can help, is how to approach the ongoing maintenance and care of your existing garden in a waterwise way.
To design and create a waterwise garden from scratch, you’ll need to talk to a Perth landscaping company like our sister company at Perth Landscaping Experts to carry out your project!
Here are our care and maintenance tips for Waterwise Gardening
1. Choose Waterwise Plants
Even the most established garden will always need some replanting or additional planting along the way. When you replace or add plants to your garden, make sure that you are choosing plants that are native or adapted, as well as right for the location so they will require as little water as possible. These plants have evolved to thrive in hot and dry conditions, requiring less water once established. Incorporate or make the switch to drought-tolerant species such as kangaroo paw, lavender, grevillea, and rosemary in your garden or opt for low-water grass varieties. Ask your local nursery, check out the Water Corporation’s “Waterwise Plants for Perth” database, or talk to a local landscaping company with horticulturalists on their team for help with waterwise plant selection.
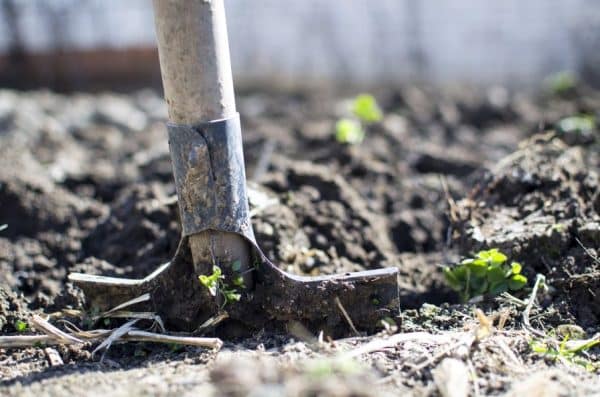
2. Improve Soil Health
While this is often overlooked, by investing in improving your soil’s health and structure, it can really enhance water absorption and retention and reduce runoff. Dig in organic matter, such as compost or well-rotted manure, to improve soil structure, promote water infiltration, and increase moisture-holding capacity. You can also regularly apply a wetting agent, especially in hot dry Perth summers, to make sure your garden can use every drop of water it gets. Healthy soil allows roots to access water more efficiently, reducing the frequency and amount of watering needed to keep your garden happy.
3. Mulch Your Garden
One of the most effective and proven ways to reduce watering and increase the health of your plants and soils is the correct application of much – and maintaining it at the right level year-round. Mulch acts as a protective barrier, reducing evaporation and suppressing weed growth. It also helps regulate soil temperature and conserves moisture, allowing you to water less frequently. Maintain a mulch layer of around 3-4 inches for optimal effectiveness. We love pine bark mulch for its look, chunky style (waterwise mulches should have a coarse and irregular texture) and natural material – it’s a great choice for most plants and gardens here in Perth.
4. Smart Watering Techniques
If you have a garden in Perth, you know all about the need for a reticulation system and will be aware that it must be switched off over Winter and is restricted to 2 watering days the rest of the year. We fully support this initiative and don’t worry; it is still possible to keep your garden happy using waterwise gardening methods and smart watering techniques.
These include:
a. Watering Deeply: Instead of frequent shallow watering, water deeply during your watering times. This encourages deep root growth, making plants more resilient to drought and makes sure that it doesn’t just wet the top of the soil but get all the way to the roots.
b. Time Your Watering: Water your garden during the early morning before 6am or late evening (but we recommend the mornings) when temperatures are cooler – never when the sun is out. This minimises evaporation and ensures more efficient water absorption by plants.
c. Choose a Waterwise irrigation company: They will understand things like which sprinkler heads and watering durations will deliver the right amount of water to your plants in the watering times you have allocated, and know how to extend or optimise your system so the water is getting to all areas of your lawns and gardens that need them.
d. Utilize Rainwater: Install a rainwater harvesting system to collect and store rainwater for later use in the garden. Use it for watering during drier periods or for specific plants that require extra attention.
e. Know Your Plants. If you have an established native garden, you may not need to water it much anymore, if at all. So, if your reticulation system is currently in ‘set and forget’ mode, you might want to take another look at your garden and see how much water your plants in their current state of growth actually need.
f. Watch your system watering. If your system is running at 6am, you might not have seen it in a while, so things like leaks, broken sprinklers that don’t pop up anymore or areas where more water might be going on your paths or driveways than your gardens!
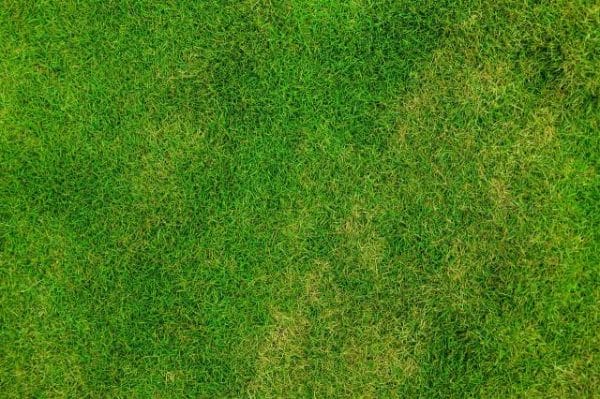
5. Consider – Do You Really Need a Lawn?
We love a green vibrant lawn as much as anyone – but we also love making smart and waterwise garden choices. If you have a large verge area or grassed backyard, but don’t have a dog or you and your family just never use the area, maybe it’s time to consider replacing part or all of the grassy area with water-efficient alternatives like native ground covers or mulch. Turning your verge into a lush, native garden will reduce your water use dramatically, reduce the need for lawn mowing, and make it an incredibly attractive entrance to your property!
Another option is to replant lawn areas that don’t get much sun, such as around the base of a tree, with alternatives like native ground covers or mulch. Often lawn struggles to grow in these areas anyway so this won’t just reduce your maintenance requirements and water use but can also improve the entire look of the area as it will stay green where lawn would look turn brown or unhealthy.
At the end of the day, we all love a lawn, so for the spaces in your landscape you really must have one, go for a water-efficient species such as Saltene, Zoysia or one of the soft leafed Buffalos.
6. Carry Out Regular Garden Maintenance
Maintaining a waterwise garden involves regular care and attention. Having a regular gardening service helps with things like:
Pruning and trimming plants to make sure the sun, rain and reticulation system can get to all areas of your gardens and lawns
Well-pruned plants are also more efficient in their water utilisation than overgrown ones
Control weed growth so that every drop of water and nutrients are going to your plants, not to them! This also stops the weeds from blocking your sprinkler heads which can impact their area coverage
Regular mulch top-ups to maintain their water retention and fill in any gaps that occur
Prompt spotting of any garden health issues like dry or dead spots, reticulation leaks or water wastage
Did you know we are a waterwise garden company?
We are certified with the Water Corporation Waterwise Program, and so are our sister companies, so for anything garden maintenance, reticulation or landscaping, we can help or point you in the right direction!
Ready to create and maintain a waterwise garden?
We hope that by knowing and implementing these tips, you can enjoy a beautiful and thriving garden while significantly reducing water usage. By choosing the right plants, improving soil health, mulching effectively, utilising smart watering techniques, and practicing regular garden maintenance, you can contribute to conserving our valuable water resources while enjoying the beauty of your garden.
For help with regular garden maintenance, just get in touch with us on 08 6263 4645 and our lovely team will be happy to help your garden thrive!
Whether you are a keen gardener with the greenest of thumbs, or just starting out on your gardening journey, if you want a healthy, beautiful and thriving garden, pruning is a vital skill to learn.
Pruning is an important gardening practice that can help to maintain the health, shape, and productivity of plants, as well as improve their appearance. This applies to many plants; from trees to shrubs and other plants and flowers.
What is Pruning?
At it’s most basic level, pruning is what we call the task of cutting back or removing certain parts of a plant, such as branches, stems, or leaves. Critical for garden health, without proper pruning, your shrubs, bushes, trees and plants will not have the maintenance and support they need to thrive.
Knowing when to prune, depending on the season and temperature, and how to prune, for example, when to just give a light trim and when to really cut it back, is important for any garden proud homeowner.
Benefits of Pruning?
Pruning is important for a number of reasons. Critically, because, when done incorrectly, it can have a serious impact on the health, look and growth of your plants. At worst, improper pruning can kill a plant altogether or permantenly stunt it’s growth. So keep reading to learn how to do it right!
Some of the many benefits of pruning include:
Promote Growth
Firstly, it can help to promote the growth of new branches, leaves, and flowers. By removing dead, damaged, or diseased parts of a plant, you can encourage new growth and help the plant to remain healthy and productive. Pruning fruit trees encourages increased productivity and improves growth rates season upon season. In other hedges and shrubs, it increase growth by encouraging new shoots, helping plants grow taller and stronger. And in flowering plants, pruning improves growth and makes sure that they will continue to flower.
Prevent Disease
Pruning can be strategically applied to remove any parts of the plant that are dead, damaged, or infected with disease. This helps to prevent the spread of disease or pests to other parts of the plant, and allows the plant to focus its energy on healthy growth. While cutting it right back may sometimes be needed and not look great – it will be worth it to save it in the long run.
Aesthetics
No one likes an untidy bush… straggly, overgrown hedges and plants make the entire garden look untidy and un-cared for, while shaped, maintained plants give the whole garden a lift!
Pruning can be used to train and control plants to help them grow to the desired size, hight and shape to suit your garden design. From shrubs that are pruned into round balls or vines that are trained to grow in the right directions, pruning will definitely improve the astheics of your garden.
Safety
Especially important in winter, pruning also allows you to remove dead or heavy branches and limbs which might otherwise fall and injure unsuspecting passersby. From risks of stong winds or heavy rains, or very dry periods where dead branches grow brittle, careful pruning keeps your garden safe. It also helps to deter pests or vermin by eliminating potential breeding grounds or hiding places for pests, and increasing air circulation can make it more difficult for them to thrive. Additionally, pruning can help to prevent branches from touching nearby structures, which can provide a pathway for pests to enter your home or garden.
Protects Property
Not just increasing garden safety for people, pruning helps protect your property from falling limbs on cars or your house, prevent branches scratching windows or car paint, and even stop branches or heavy leaves from clogging up your drains causing more work.
Thick and overgrown shrubs can even collect dirt and create mould/scum patches on the edges of paths or driveways that take pressure cleaning or heavy scrubbing to remove. It’s always better to keep things tidy and under control.
Improve light
Some of your other plants or even lawn might suffer if your garden isn’t pruned back regularly. Thick or tall growth can reduce sunlight from getting to the lower areas and plants in your garden, reducing their health and growth chances by limiting their sun and air intake. Pruning decreases the competition between your plants for the nutrients they need to thrive.
Aids Reticulation
If your garden relies on an irrigation system to get the water it needs, garden overgrowth is one of your reticulation systems biggest problems. If hedges and plants aren’t pruned back regularly, they can block a sprinklers water coverage, causing dry patches in your lawns or stopping certain plants from getting any water at all.
Now that you know what pruning is and how important it is for your garden, let’s go a little deeper and learn more about the different types of pruning techniques to use.
Types of Pruning?
There are a few different types of pruning you can use, depending on the season and the type of plant; types of pruning will also differ depending on if it’s for trees, shrubs, fruit plants or flowers.
Types of Tree Pruning
At Perth Gardening Experts, we cann’t help with any major tree pruning – only for smaller trees under 3m in height – for anything higher, you’ll need to get an arborist involved. We’ll give you some tips here, but always make sure that you feel confident and safe – and never prune any heavy or large branches above your head!
Thinning
Thinning involves selectively removing branches from the crown to increase light penetration and air circulation, reduce wind resistance, and promote new growth. Done correctly, thinning can open up the canopy of a plant and allow more air and sunlight to reach the inner branches and leaves. This can reduce the risk of fungal diseases and promote healthy growth. Especially important in fruit tree pruning, it will improve the production of your fruit trees.
Lifting / Raising
This type of pruning involves removing the lower branches of the tree, and is usually done to provide clearance for buildings, vehicles, and pedestrians above paths, streets and walkways.
Reduction
This pruning involves removing the upper branches of the tree to reduce the overall height or spread of the tree. This is usually to prevent the tree from interfering with power lines or structures, or to reduce the weight of the canopy to prevent breakage. To avoid having to apply this technique, it is important to stay on top of pruning the tree to train it as it grows – rather than having to do a big cutback later.
Shaping
This is usually the reason you get a garden maintenance company or arbourist in – when you want to shape the tree to suit a garden design, the space or improve the overall look. Common shapes are natural, spherical round styles, or keeping the bottom of the tree cut in a straight line for a very tidy look.
Structural
Often done in the early stages of a young tree’s growth, structual pruning is used to improve the structure and stability of the tree, training from a young age to growth thicker where needed and promote the right shape for it to grow into.
Types of Shrub Pruning
At Perth Gardening Experts, we have experience in all types of shrub pruning, whether it’s for shape, improving the overall look, improving health or more. So if you decide that, after reading our blog, you want some help – just give us a call.
Maintenance
Something we are particularly passionate about, maintenance pruning involves removing dead or diseased branches of your shrub, and shaping the shrub to maintain its size and shape. This type of pruning is the key to keeping your garden looking great – year round.
Renewal / Growth
This pruning is applied when you need to cut back the entire shrub to stimulate new growth and rejuvenate the plant. This is typically done in older shrubs or those that have become overgrown.
Pruning for Fruit Trees, Bushes and Plants, and Flowers
Now we’ve covered how to prune trees and shrubs, it’s now time to look at how to prune fruiting and flowering trees, bushes, plants and flowers such as roses to promote growth of the flowers and fruit.
If you know anything about plants and flowers, you’ll know there are hundreds of varieties and best practice pruning methods will differ based on the variety, the season and your location, so we’ll only be able to give a basic overview in this blog to get you started.
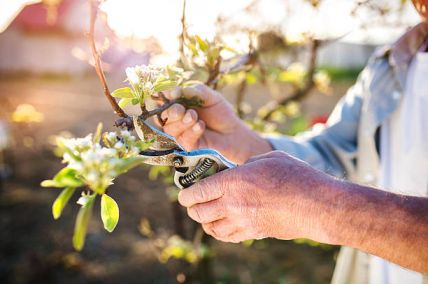
Pruning Fruiting Trees and Bushes
The best time to prune fruiting trees and bushes in Perth is during the plant’s dormant season, which is typically in winter. Pruning during this time helps the plant to focus its energy on new growth in the spring and summer, and it also reduces the risk of damaging the plant’s fruit production.
Here are some tips on pruning fruit trees:
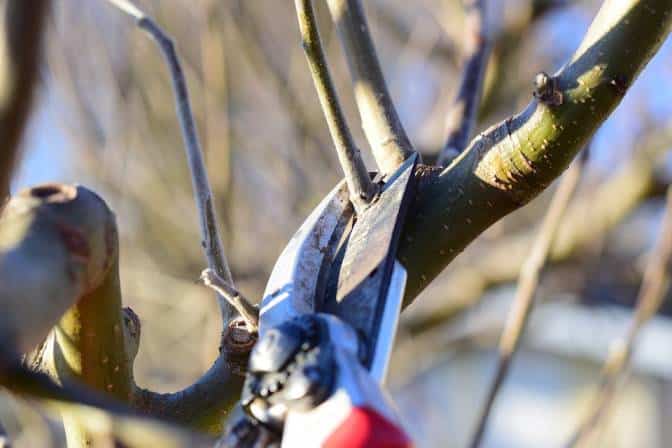
Remove dead and diseased wood: As you prune, look for any dead or diseased wood and remove it. This will prevent the spread of disease and encourage healthy growth.
Thin out overcrowded branches: If your tree or bush has too many branches, it’s important to thin them out to allow for better air circulation and light penetration. This will promote better fruit production.
Cut back to outward-facing buds: When making cuts, be sure to cut back to an outward-facing bud. This will encourage new growth to grow outward, which will help keep the plant from becoming too dense.
Prune to promote fruit production: Finally, be sure to prune in a way that promotes fruit production. This may mean cutting back some branches more than others to encourage fruiting spurs to form.
For deciduous fruit trees like apples, pears, and peaches, it’s best to prune them during their winter dormancy, usually from late June to early August in Perth. For evergreen fruit trees like citrus, you can prune them throughout the year, but the best time is right after the fruit has been harvested, typically in late winter to early spring.
It’s important to note that pruning timing can vary depending on the specific variety of fruiting tree or bush you have, as well as the local climate conditions. Therefore, it’s always a good idea to do some research or consult with a local gardening expert to find the best pruning schedule and more information on pruning fruit trees in Perth.
Pruning Flowering Bushes and Plants
The best time to prune flowering bushes and plants in Perth, Australia depends on the specific plant species, but a general rule of thumb is to prune after flowering has finished. This ensures that you don’t accidentally remove any flower buds that have formed for the upcoming season.
Here are some tips on how to prune flowering bushes and plants in Perth:
Choose the right tools: For smaller flowering plants, pruning shears or hand-held loppers may be sufficient. For larger bushes, a pruning saw may be necessary. Make sure your tools are sharp and clean to prevent damaging the plant.
Remove dead or diseased wood: As you prune, look for any dead or diseased wood and remove it. This will help prevent the spread of disease and promote healthy growth.
Cut back to healthy growth: When making cuts, be sure to cut back to a healthy growth point, such as a bud or lateral branch. Avoid cutting back too much at once, as this can weaken the plant.
Don’t over-prune: It’s important not to over-prune flowering bushes and plants, as this can lead to reduced flowering or even death of the plant. Only prune what is necessary to promote healthy growth and shape the plant.
Examples of flowering bushes that require pruning include roses, hydrangeas, and lilacs, which should be pruned after flowering. Other plants, like hibiscus, can be pruned in late winter or early spring before new growth begins.
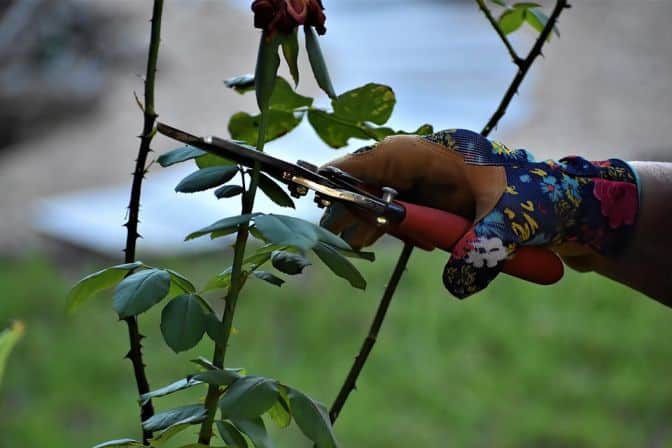
Pruning Roses
The best time to prune roses in Perth, Australia is in winter, during their dormant season. The ideal time to prune is after the last frost of the season and before new growth appears, which is usually between June and August.
Choose the right time: As mentioned earlier, the best time to prune roses is in winter, during their dormant season. Wait until after the last frost of the season and before new growth appears, which is usually between June and August in Perth, Australia.
Identify the canes: Look for the main canes or stems of the rose bush. You’ll want to keep the strongest and healthiest ones and remove the weak or diseased ones.
Remove dead and diseased wood: Using sharp, clean pruning shears, cut out any dead, damaged, or diseased wood. Be sure to cut back to healthy wood.
Shape the plant: Prune to shape the plant and encourage an open, airy structure that allows good airflow and sunlight penetration. Cut back to a leaf node that faces the direction you want new growth to go.
Cut back to an outward-facing bud: When making cuts, cut back to an outward-facing bud to encourage new growth to grow outward, which will help keep the plant from becoming too dense.
Clean up green waste: Once you’ve finished pruning, remove all debris from around the plant to help prevent the spread of disease.
Fertilize and water: After pruning, fertilize the plant with a balanced fertilizer to help promote new growth, and water the plant thoroughly to help it recover and encourage new growth.
It’s important not to over-prune roses, as this can weaken the plant and reduce its ability to produce flowers. Only prune what is necessary to promote healthy growth and maintain the desired shape of the plant. By following these steps and pruning during the dormant season, you can help promote healthy growth, encourage abundant flowering, and maintain the overall health of your rose bushes.
Best Time To Prune
The best time to prune plants varies depending on the type of plant. In general, plants can be pruned when they are dormant, which is typically during the winter months when the plant has lost its leaves and is not actively growing.
However, some plants should not be pruned during the winter, such as those that bloom in the spring, because pruning during the winter can remove the buds that would have produced the flowers. These plants should be pruned immediately after they finish flowering, which is usually in the late spring or early summer.
For plants that are grown for their foliage, such as shrubs and hedges, it’s best to prune them in the late winter or early spring before new growth begins. This allows the plant to produce new growth that will fill in the areas that were pruned.
In general, it’s important to research the specific plant you want to prune and understand its growth habits, flowering time, and preferred pruning time. This will ensure that you prune the plant at the right time and in the right way to promote healthy growth and flowering.
Conclusion
Proper pruning is crucial to keep your trees, shrubs and plants healthy, tidy and attractive and to encourage flowers and fruit. You can see by now hoe important it is to do it not just at the right time, but in the right way to protect and increase the health and beauty of your plants.
If the thought of tackling your own plant and shrub pruning seems too stressful and you want to call in the experts, you can always get in touch with our team at Perth Gardening Experts on 08 6263 4645. We’ll take care of it for you throughout the year to make sure your plants grow healthy, stay in beautiful shape and look amazing in every season.
Time for a garden tidy-up but your green bin isn’t quite going to do the trick?
Here are some tips on green waste removal options to help you face your next big garden clean up…
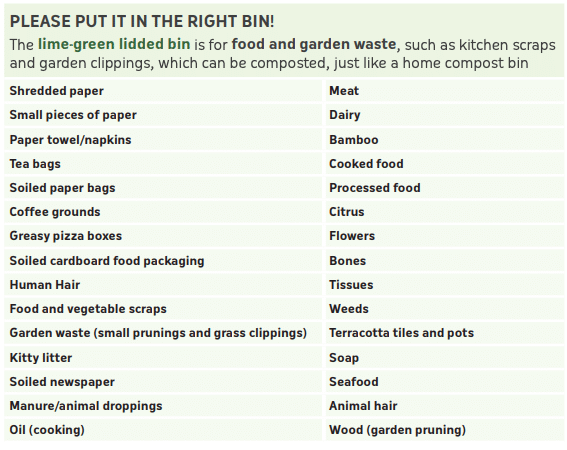
Use Your Green Waste Bin
If you don’t have much green waste, your council-issued green waste bin might just do the trick. This is usually the case if you stay on top of things and just have a few weeds to pull or a shrub or two that needs a light trim. Keep in mind, it might look large when empty, but can fill up after a good clean-up in just a single garden bed!
You can put the following from your garden in your green bin:
Organic waste
Grass clippings
Small prunings
Wood (branches, pruning, etc)
Weeds
Dog poop
It’s important to keep your green waste bin uncontaminated so it can be recycled and repurposed properly!
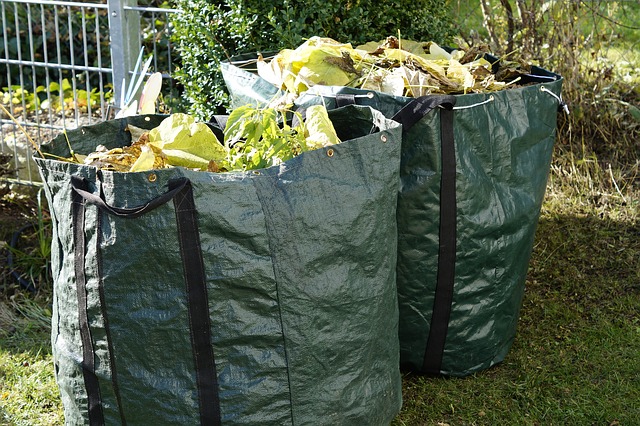
Skip Bins – for large amounts of Green Waste Disposal
If you are doing a big garden clean-up, and don’t have a trailer to take it to the tip yourself, you’re going to need to hire a skip bin.
Sizes usually range from 3 cubic metres to 12 cubic metres and can be hired from many companies around Perth.
This allows you, not just bigger quantities, but for larger, heavier green waste disposal. The company will take it to a registered green waste recycling/composting facility so it can be turned into compost and mulch – rather than getting tossed in landfill.
In skip bins, you can dispose of additional green waste such as:
Large tree branches/stumps
Soil
Palm fronds
Along with the usual weeds, pruning, clippings, etc.
Skip bins can start from a few hundred dollars, but if the alternative is making multiple trips to the tip, it can be worth it in the end.
Tip – many green waste disposal facilities now won’t accept Prickly Pear cuttings so check with your skip bin company when booking.
Book a Garden Clean Up Service
Don’t want the hassle of gardening and green waste removal yourself?
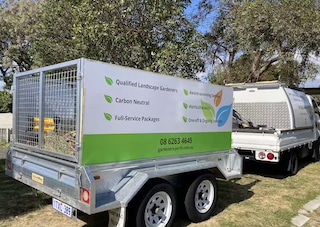
As part of our Garden Cleanup and Garden Maintenance Packages, we are able to remove large quantities of green waste for you. Each of our Gardening Packages comes with an allocation of green waste removal, but if your service generates a larger quantity; e.g. after a yearly hedge trimming service or cleanup of a very overgrown and neglected garden, we can remove the extra for you.
We can also advise if it will require a full trailer load or organise a skip bin for you if it is a serious cleanup of a property that is more ‘jungle’ than garden! Either way, we will make sure that your garden is left looking healthy, well-maintained and tidy – so you don’t have to organise a thing.
Get in touch to book a gardening service today
Call our team on 08 6363 4645 to book in your garden service – we’ll take care of the clean up and remove all the green waste for you!
Here are some green waste removal FAQs…
Do you do garden clean-ups before green waste verge collection?
Yes! This is a great time to take advantage of the free green waste removal and give your hedges a good trim and your gardens a refresh! Contact us to book in for a garden clean-up before your suburb’s next collection.
How much green waste can you remove?
We travel with large trailers and can remove approximately 5m3 of green wastes at one time.
Is this a service you offer in your regular maintenance packages?
It sure is. If you have booked our team for a garden maintenance service or clean up, we will always remove the green waste generate as part of your service. Additional charges may apply.
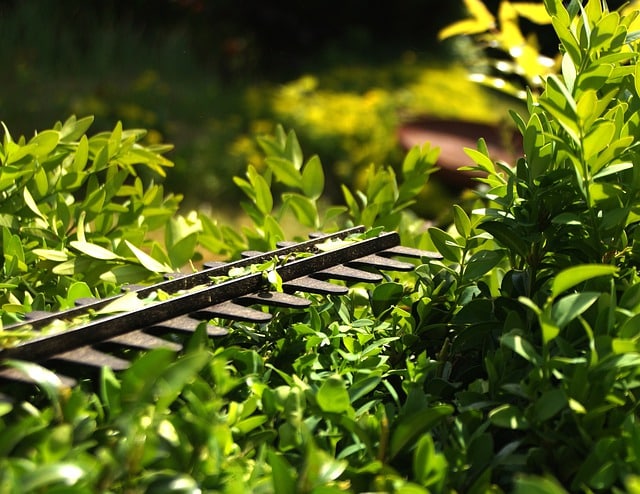
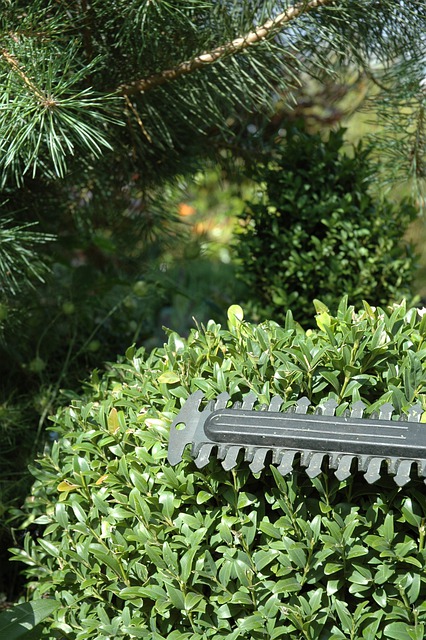
We all need a haircut now and then. Our plants are no different!
Every living thing needs a little TLC. A regular trim, also known as pruning, is a great way to achieve this for hedges, shrubs and bushes.
Pruning can help to:
maintain a manageable height
create special shapes/growth habits (e.g. topiary, standards, espaliered plants)
remove unhealthy growth like dead/diseased branches, water shoots and suckers
improve airflow, light, and water penetration
reduce competition/overcrowding
grow better fruit and flowers
stimulate new growth
improve plant health
add ‘curbside appeal’ to your home.
For those new to pruning, knowing when and where to start, and how far to go without damaging delicate plants, can be intimidating.
Fear not! This blog post gives our top tips on how to prune hedges and bushes like an expert!
What’s the Difference Between Hedges, Bushes and Shrubs?
These terms are often used interchangeably, but there are differences.
What is a Hedge?
A group of bushes or shrubs, closely planted to:
create privacy
act as a fence/boundary/windbreak or
fit an aesthetic theme (e.g. formal gardens).
What is a Bush?
A small, woody plant, with dense, low-growing branches, typically up to 2.5m tall.
Bushes fill spaces, add contrast, and can be decorative showpieces!
Popular ornamentals include camelias, azaleas, and hydrangeas.
What is a Shrub?
It’s like a bush, but larger — up to 6m tall.
Shrubs can stand alone, or be massed together as hedges. They can be used to:
shelter plants, livestock or buildingsfrom sun/weather
attract wildlife
add colour/texture/contrast to gardens
create topiary (decorative shaped bushes).
See some of our recent hedge and shrub trimming services
When to Trim Hedges and Shrubs in Perth
When you prune depends on the plant, and why it needs pruning — for example, appearance, manageability, or plant health.
Some pruning can be done almost anytime — for example, removing dead branches, suckers, water shoots, diseased or damaged growth.
Late winter, after the coldest weather is over, is usually best for annual pruning, especially for summer and autumn-flowering plants. This promotes healthy spring growth.
The general rule is to prune after flowering or fruiting. Spring-flowering plants are pruned after flowering ends.
Be cautious about autumn pruning though — new growth can be damaged by winter cold. Prune deciduous plants lightly soon after planting, then again in winter when dormant. Summer maintenance pruning stimulates growth. Plant evergreens in spring and trim them immediately, then biannually. Trim more frequently for a denser hedge.
Light Trimming and Tip Pruning
Light pruning suits young plants that might be damaged by hard pruning. Even before plants grow together to form a hedge, regular light trimming improves foliage density, for a well-formed hedge.
A light all-over trim using shears or a hedge-trimmer also helps to shape shrubs.
Removing deadheads and deadwood improves plant health. Trim at the 2nd or 3rd eye bud, immediately below the flower-bearing stalk.
To tip or pinch-prune, remove the ends of shoots during the growing season, pinching them out by hand. This encourages new shoots, shapely growth, and more flowers.
Moderate Trimming/Pruning
Moderate pruning suits established plants.
Cut healthy shoots back by about one-third of the whole plant, or half the previous year’s growth, to about 45-60cm from the base.
This stimulates more new growth than light pruning.
Hard Trimming/Pruning
Hard pruning (rejuvenation pruning) can be beneficial where pruning is long overdue.
It is especially appropriate for:
plants that get badly out of control like honeysuckle
vigorous deciduous species like forsythia and viburnum
common hedging plants like privet and Japanese holly
multi-stemmed shrubs like lilacs and roses.
Hard pruning of healthy plants to about 20-30cms above the ground encourages the plant to grow into a better shape.
Avoid hard pruning of unhealthy plants, as it can send them into shock.
What Tools to Use to Trim a Hedge
You are only as good as your tools — so invest in the right tools for the job.
Buy the best you can afford to make it both easier for you and better for the hedges — ground-steel blades and gear technology can help maximise cutting power.
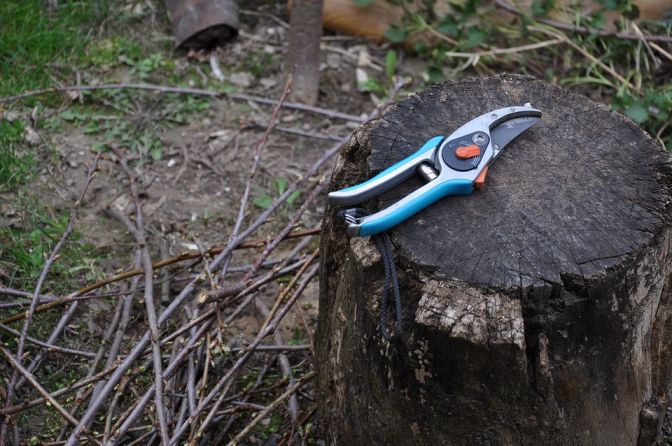
Secateurs: your go-to hand tool for pruning, trimming, and deadheading. Choose secateurs with a bypass blade and gears.
Hedging Snips: a light, sharp hand tool, with long flat blades — useful for fine trimming of leaves and small stems.
Lopper: long-handled secateurs for pruning high branches, tall hedges and dead wood.
Pole Pruner: a small saw/secateur, mounted on a telescopic pole (manual or powered), used for safely trimming high branches.
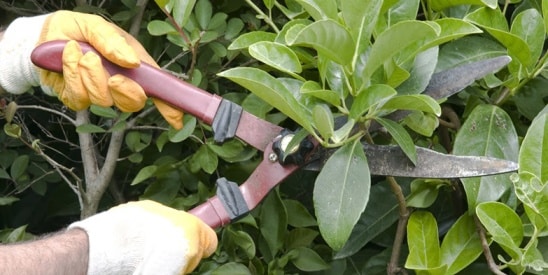
Hedge Shears/Clippers: long-bladed hand tool for light trimming/shaping of shrubs and straight edges (e.g hedges).
Pruning Saw: a small, sharp hand saw, for branches up to 10cm thick. The narrow blade accesses dense foliage.
Hedge Trimmer: a motorised saw, optimal for trimming large/formal hedges efficiently. Choose from petrol, mains-electric, or battery-powered options.
Chainsaw: useful for big jobs, but less precise than hedge trimmers/shears. Use very carefully to avoid injury!
For assistance with hedge-trimming, contact us at Perth Gardening Experts. We use commercial-grade electric tools — much quieter and more environmentally friendly than petrol-powered tools. And our team are experts at trimming and shaping hedges.
How to Trim Hedges Correctly
Why trim hedges correctly?
Correct trimming keeps hedges compact and attractive, and stimulates growth.
Incorrect pruning can weaken plants and look terrible.
Step 1: Prepare Your Environment
Have a plan. Consider the weather — don’t prune in wind or rain.
Ensure hand-tools are sharp and power tools are fueled/charged.
If you aren’t confident to cut by eye, set string lines to help you cut straight. Save on clean-up time by using a drop-sheet to catch clippings.
Step 2: Remove Dead and Diseased Branches
Remove dead and diseased branches first.
Cut problem limbs back to their base, or to a strong lateral branch or shoot. This stops disease from spreading further, improves nutrient uptake, and encourages growth.
Step 3: Trim and Shape the Hedge
Trim protruding branches, then fine prune, for a smooth surface appearance. Start slowly — you can always take more off later, but you can’t put anything back!
For medium-height hedges, trim sides first, from back to front, cutting vertically. Prune the top horizontally, positioning your saw at a slight angle.
For tall hedges, trim the top first, then the sides. If using a ladder, tie it to a tree, or have someone hold it.
Always hold the cutting blade close to the main stem, cutting cleanly without tearing. Cut just outside the branch collar (where the branch begins). Don’t leave stubs — these encourage pests and diseases. Make your hedge wider at the base, so sunlight can reach lower areas.
NOTE: If you aren’t comfortable climbing a ladder, call our team at Perth Gardening Experts on 08 6263 4645! Our expert staff safely prune hedges up to 3m in height.
Feed your shrubs after pruning, using the right fertiliser for the type of plant.
Conclusion on How to Trim Hedges
Now you know why effective hedge trimming is vital to keep it healthy and immaculate.
You also know how and when to prune, to make your shrubs a stunning garden feature.
But let’s face it, we all just have way too much on our plate at times!
So before your hedge gets out of hand, and if you are worried about safety or achieving a beautiful end result, call Perth Gardening Experts and we’ll take care of it for you.
Whether it’s a one-off visit you need, or a convenient long-term maintenance package, we can help!
Call us on 08 6263 4645 or get in touch online — our friendly team are happy to discuss how PGE can help keep your garden looking great!
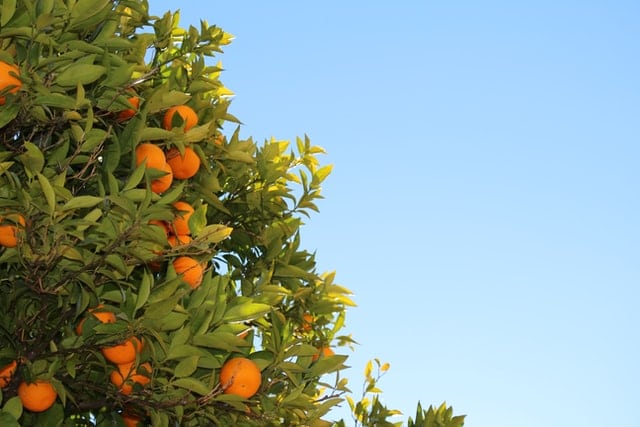
As the weather changes, trees and plants can come under stress. During these times, it’s crucial to know how to take care of your precious fruit trees.
An important part of this is pruning your fruit trees.
For inexperienced gardeners, pruning can feel intimidating — once a branch is pruned, there’s no going back! However, it doesn’t have to be as scary as it seems.
As part of our regular garden maintenance services, we prune a lot of citrus and fruit trees in Perth, citrus fruit trees seem to be especially popular with our clients. So we thought we would provide a few tips on how to take care of them through proper pruning!
In this blog post, we’ll run you through some essentials you need to know to keep your fruit trees pruned, healthy and happy along with a few of our “garden geek” tips.
Why Should You Prune Fruit Trees?
Pruning your fruit trees is important to ensure trees stay healthy and happy. This is particularly true during winter for most types of fruit trees.
Essentially, the pruning process is about promoting growth for your trees. Branches that you cut back will re-grow, in turn encouraging the tree to produce more fruit.
Pruning also helps the tree’s general health and can make it more aesthetically pleasing.
Pruning trees helps to:
develop and maintain ideal tree shape and size
allow more sunlight into the centre of the tree
improve air circulation around leaves and branches
reduce the risk of disease
remove dead branches — these can harm the tree and become a safety hazard!
When Is The Best Time For Pruning Fruit Trees?
There are several types of pruning and many types of fruit trees. Pruning is recommended at different times of the year depending on the climate, why you are pruning, and the type of fruit tree.
In most cases fruit trees are pruned in winter, or early spring, when the tree is dormant (not actively growing).
Dormant pruning
In Perth dormant pruning is typically performed in the colder months (June to August).
This type of pruning aims to protect the structure of a mature tree, or help a young tree form a basic shape. It stops branches from crowding together or crossing over one another.
Dead, diseased or broken branches can also be removed. These are not just unsightly, they drain the plant’s energy!
Summer pruning
Summer pruning is often done around December in Perth, to keep vigorous trees to a manageable size.
Summer pruning is also useful to maintain a pleasing shape.
The other reason for summer pruning is that some types of fruit trees, like apricots and cherries, become more disease prone if pruned in winter.
During Summer pruning, you usually remove any suckers (shoots that grow low down on the trunk). These often grow as a response to compromised roots.
Cut them as low as possible to discourage reshooting. This helps to conserve the tree’s energy for more productive growth.
Inner-facing branches are removed to improve sunlight and airflow to the centre of the tree. Other branches can be shortened, both to balance the tree’s appearance and to prevent them getting too long and thin – these types of branches are prone to breakage when loaded with fruit.
Other seasonal preferences:
Citrus – prune tips all year round as needed
Figs – prune in winter
Apples and pears – deciduous trees are pruned while dormant
Grapes – prune hard in winter, trim in the warm months
The life cycle of a fruit tree
How often you should prune also depends on the age of the tree.
Pruning in year one is to form the tree’s shape and encourage growth. Trim the central trunk down to where there is an outward-facing bud, about 75cms above ground.
The next year remove inward-facing branches and lower shoots. Reduce upward shoots by half to allow for new branches.
By year three your fruit tree will have its shape. Cut the best branches in half – this strengthens the tree to carry fruit.
By year four you won’t need to prune heavily after fruiting. Large branches can be reduced by one-third and the top pruned to keep the height manageable.
After five years, pruning your mature tree once a year after fruiting is all that’s needed.
If you want to hand over the fruit tree pruning to the professionals, have a look at our tree pruning services and get in touch.
What Tools Do You Need to Prune Fruit Trees?
When pruning fruit trees, your main tool will probably be sharp secateurs. You might also use a tree lopping tool for larger branches, or a pruning saw if making major structural changes.
Before pruning, and even between pruning individual trees, disinfect the blades of tools you use with a solution of 1 part bleach to 10 parts water (don’t make it any stronger!)
This removes traces of tree sap and other contaminants, reducing the risk of disease being carried from tree to tree by tools.
How To Prune Fruit Trees — A Step-by-Step Guide
Now that you understand the “why” and have all the tools you need, it’s time to learn the steps to a perfect pruning.
Step 1: Clean Up the Deadwood
Firstly, examine your tree for branches that are dead or broken. These can be a hazard during extreme weather and a danger to your tree, encouraging disease and stunting growth. Cut these away to help your tree (and your property) stay healthy!
Step 2: Trim out Sprouts and Suckers
Your next step is to trim unnecessary growth like water sprouts and suckers.
Water sprouts are vertical growths caused by stress or damage — for example, from severe weather, soil compaction, drought, or disease.
Growing from dormant, buried buds in the bark, water sprouts appear on the trunk and branches of a tree, sapping the tree’s energy. They can ruin its shape, allowing pathogens and disease in and weakening an otherwise strong structure.
Suckers look similar, but grow around the base of the tree from the root system, stealing nutrients and ruining the ‘look’ of a tree. They’re also best removed to conserve the tree’s energy.
Step 3: Cut Back and Thin Out
At this point, it’s time to begin the main job.
First, thin out the branches of your fruit tree to allow more light and air into the canopy. This will help your tree produce more fruit!
Next, cut back any wayward branches running sideways, downwards or crowding over each other.
Step back and take a look at your tree. If branches are spaced out evenly and spreading out from the middle of the tree, then you’re golden.
If you can still see branches competing or crossing over each other, check if any are growing from the same spot or next to each other from different points on the tree.
In either case, keep the healthiest branch with the best angle from the tree (branches should sit at approx. two o’clock or ten o’clock position). Remove the weaker competing branch.
Finish up your thinning out process by giving all branches around 15-30cm of air space. (Smaller branches can be left a little closer together.)
Step 4: Topping and Skirting
Another aspect to pruning fruit trees is topping and skirting.
Topping
Pruning the top of a tree to make it easier to harvest from is controversial. It is best to only do this when necessary (for example to help a tree recover from storm damage) and if you are confident the tree can recover.
Topping trees can lead to unbalanced root-to-crown ratio, disturbing the tree’s ability to produce energy and photosynthesise. A tree may also be shocked by topping and grow erratically. These problems can lead to tree death.
Skirting
This is the process of cutting back branches hanging low to the ground. Well-developed trees should be skirted to about 75cm above ground level, leaving enough room for the branches to droop a little when bearing fruit, without dragging on the ground.
Step 5: Heading Back
Heading back is the process of shortening a branch or new shoot to encourage growth, and is performed on the outer edges of the tree. Think of this as giving the tree a haircut!
Heading back keeps a tree looking neat, and helps branches grow solid and strong.
For best results, cut back approx. 20-30% of last year’s growth — this could be anywhere between 5cm and 1.5m depending on the tree type and maturity.
FRUIT TREE PRUNING TIP
Remember, when pruning any tree it’s best to cut as close to the branch as possible!
Fruit Tree Pruning Shapes
For an extra special touch, shape your fruit trees in a way that suits the overall look of your garden. This will make your trees look well-cared for and give your garden a consistent aesthetic.
Natural
Natural shaping is a “hands-off” philosophy that says that a fruit tree will fruit quicker and more strongly if left without pruning. Those who are fans of natural gardening techniques may prefer this option.
Trees can grow very tall using this method, and fruit may be difficult to harvest. Suckers and sprouts may also become a problem.
Open Centre
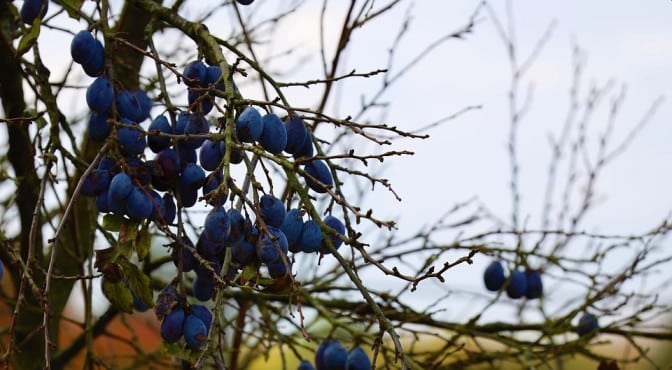
The “open center” shape is best suited to stone fruit such as plum, nectarine, apricot or cherry trees. This may also be referred to as a “vase shape”.
Often, stone fruit will grow this way naturally to begin with — in this case, select three to five of the strongest branches as a foundation and prune away any branches that cross over or compete with each other.
If your tree is shaped differently, prune branches into the vase shape described by choosing the strongest branches as a basis.
Prune branches in a way that leaves open space at the centre of the tree — this lets in more light and allows for better airflow.
Central Leader
A central leader shape is where the central trunk or “leader” forms the basis of the tree’s shape.
The central leader is emphasised by pruning all branches on the lower section of the trunk. To achieve this, trim all branches from around 9m down to the soil level.
So, you’ve just had a vibrant new carpet of lawn (otherwise known as roll on turf) laid down, and you absolutely love it!
But now of course the worry is – how do you look after it so it grows healthy and doesn’t give up on you – especially in those first few weeks.
We get asked this question by concerned clients all the time, so here we will outline the best practices in taking care of your new lawn.
Watering
This is massively important and if not done properly can cause serious damage to your beautiful new turf.
Take into consideration the attention that your new lawn will need and make sure that you don’t have any holidays planned for the first 2-3 weeks after installation – imagine having a reticulation breakdown and returning to a dead lawn!
Instant lawns, lawn runners (stolons) and seeded lawn need at least a daily watering for the first 2 weeks while establishing roots, which means you need to check with your contractor for their recommendations, as well as having a quality reticulation system installed and set accordingly. Ensure you know who to contact if your system has any problems – you don’t want to be forced to water by hand!
Watering exemptions are available with a new lawn install, for up to 45 days in summer and 35 days in winter, so make sure you have applied for an exemption.
Once the lawn is established watering restrictions apply for both residential and commercial gardens so be sure to check your watering days here.
In order to save water you can try to reduce amount of water applied but make sure to monitor how the lawn looks – if it is dry and wilting increase watering. If you see brown patches check the retic straight away to see if it is simply missing that spot, or if the problem is with the lawn itself.
Mowing
Avoid mowing until you are sure the lawn has taken and its root systems are well established. Check this by gently lifting up on the corner of a turf roll, if it pulls upward leave the mowing for another week or so, if it doesn’t move then it is ready to mow. This may be within the first 2 weeks for instant lawns so organise a gardener to come around if you don’t have time yourself. If your lawn has been watered too much it may have grown exponentially, resulting in a quickly over-grown lawn. When this happens, never cut it right down straight away, cut to around a third of its height to slowly get it back to your ideal length.
Be careful not to cut off too much for the first few mowing’s, cut high until 2-3 months after it’s fully established.
Fertilising
Check if your landscaper provides turf that has already been fertilised, often the case with instant turf, or if they can include a fertiliser when planting. Ask for a 2-month slow release fertiliser, then apply again every 2 months except in Winter June-August. It is very important to apply fertiliser in April to give your lawn an extra boost during winter, as well as at the end of August to help with spring recovery.
Look out for…
Weeds – This indicates a maintenance problem so ensure you have a regular watering, mowing and fertilising system in place
Brown Patches – Like we mentioned before, this can indicates a retic problem and needs to be checked immediately before it’s too late and the lawn dies. It could also be a pest problem or a problem with the soil itself.
The only way to be sure your lawn will survive is by constant attention and care for the first few weeks – if you aren’t able to be there then make sure you find a reliable garden and retic expert to check on your lawn and keep your irrigation system operating perfectly.