At Perth Gardening, we know the right techniques and natural treatments required to promote healthy garden growth – without relying on toxic chemicals and harmful solutions. You can still encourage growth and deter pests the natural way – and with regular maintenance, you can have a healthy organic garden that looks great while keeping your family and pets safe and healthy.
As many of us are becoming increasingly aware of the world’s ecological footprint, the demand for organic gardening is on the rise. Many gardening product manufacturers are thinking twice about what they offer as well since their market is shifting to more eco-friendly options.
After all, using organic and natural techniques for fertilising, weeding and treating your garden not only protects the Earth, but protects your family as well.
The more we learn about the negative effects of chemical pesticides and herbicides and synthetic fertilisers, the more we want to stay away from them.
That is why we try provide earth-friendly Gardening services as much as possible, from natural lawn installation to chemical-free weed control, the use of electric tools and waterwise, native planting. If you would like a gardening service that is eco-friendly from a company that is passionate about looking after our planet – we would love to help you!
From organic fertilisers to a range of organic gardening techniques, here are our tips for organic gardening.
Organic Weed Control
Our Tips for Organic Gardening
1. Non-chemical options for weed control
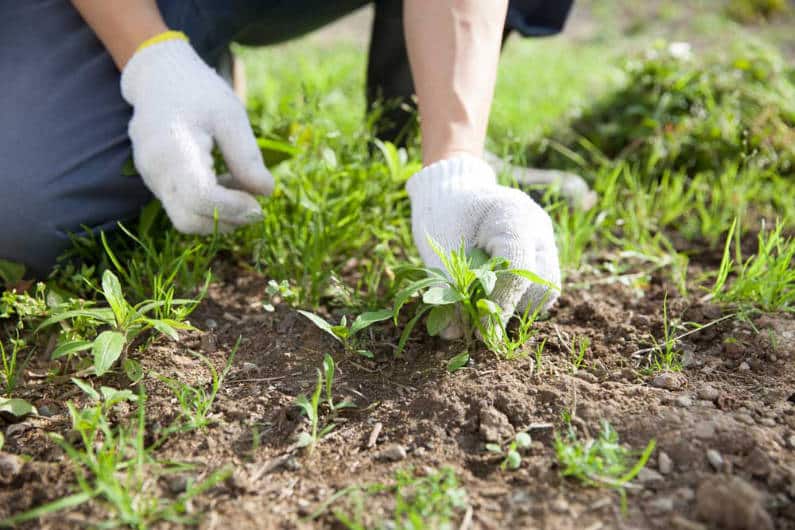
We try to avoid using chemical weed control options, most of those products are bad for the environment and very toxic for the person applying them. They also can pollute our water supply by running off into waterways and being absorbed into the soil. We believe in using preventive methods (mulching and regular garden care) that preserve the health of your garden, our waterways and the soil. In our packages, our gardeners will remove the weeds by hand to get the entire root, along with tools when needed – such as whippersnappers to cut them down and reduce growth by limiting their access to sunlight.
Mulching
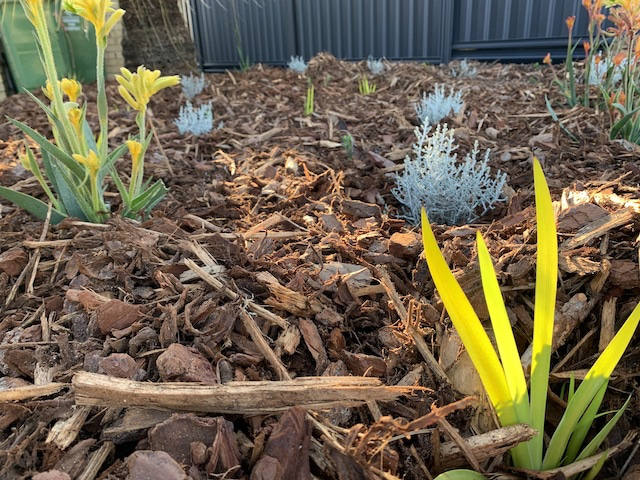
Mulching is one of the top methods for natural weed control – and as an added bonus, it also helps to improve the quality and health of the soil itself, along with reducing water evaporation so it’s great for looking after our water resources (and your water bill!) as well. Learn more about the best mulch for gardens here in our blog.
Choose a good quality mulch like Pine Bark and apply it in a good thick layer, a depth of between 50-100mm, for best results. A great thickness to aim for is 75mm to really restrict weed growth. This also means that any weeds which do grow through will be easier to pull out.
Regular Weeding
Try to stay on top of any weeds that do grow so they never get a chance to go to seed! Once they do that, you are fighting a losing battle. Let’s face it, unless you pave your entire backyard, it is a living space, so there will be growth and there will be weeds. Learn the types of weeds as well so you know where to spend your energy, for example, which are perennial (regrow season after season) and which are annual (go from seed to seed in one growing season/one year).
Planting – create competition!
Weeds need all the same nutrients that plants do, so if you have empty spaces where they are thriving – try planting something there instead! Add in groundcover or native plants so it is still low-maintenance but also looks great and takes the nutrients, water and sunlight that your weeds need. Make sure to plant them thickly so there is limited space for weeds to take over.
2. Using ‘natural’ options for fertiliser
First, why do we use fertiliser? It’s to give our plants extra nutrients. One of the biggest reasons we have to use fertilisers is that our soil itself is quite depleted and of poor quality – especially here in Perth it’s sandy soils. So the most ‘natural’ fertiliser should actually start with improving the quality of the soil. There will always be things to add for an extra boost, but if the soil is rich and healthy, your plants will be too.
Improving your soil quality
There are many ways to improve your soil and it takes work and time – but it is always worth it! Options like blood and bone or quality organic manures are a great place to start, along with adding materials that break down over time like lupin mulch. A blend of these, mixed into your soil, with a layer of clean, natural cardboard, topped with a thick layer of quality mulch, like pine bark, creates a layered, ‘green house’ effect. Give it a good soak and let it slowly work its magic, breaking down, trapping in warmth and crating its own micro-climate – eventually turning into a rich, loamy soil your plants will love!
Best natural liquid fertilisers
For a quick boost while your soil improvers work their magic, liquid fertilisers are the best way to go. Be cautious even when using natural fertiliser as often the concentration in nutrients are quite high and may leach into the waterways and pollute the soils. Our gardeners can advise on what is the best option for your garden, lawn and plants along with applying it at the right times in the right quantities for you.
Seaweed or Kelp liquid fertilisers are amazing for both plants and soil. They actually stimulate the soil itself so are the perfect complement to your soil improvement efforts.
3. Regular Garden Maintenance
One of the best ways to keep your garden healthy naturally is regular maintenance. Why?
Staying on top of your weeds so they don’t get a chance to seed, means that you don’t have to eventually resort to chemical weed killer as the only option to get on top of things again.
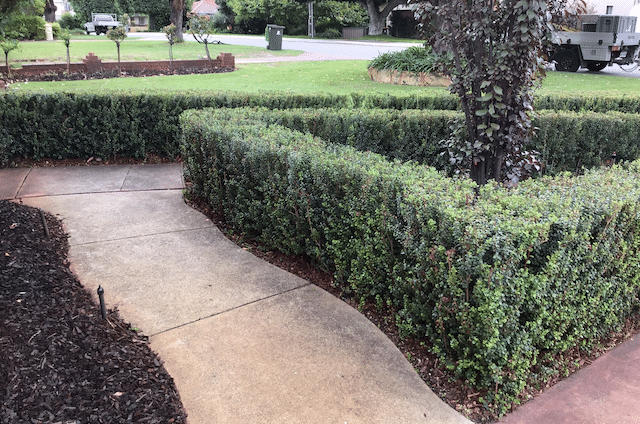
Making sure that your hedges and shrubs are trimmed and pruned regularly to promote healthy growth means you don’t have to resort to heavy doses of fertilisers to try and bring them back to life.
Regularly improving your soil by adding good quality fertiliers to build them up, regularly topping up your mulch – all these things are part of creating a healthy, resilient garden that looks beautiful… naturally.
If you would like to look after your garden in a more natural, organic way, get in touch with us to book in a service and our gardeners can provide a regular maintenance plan, advise on soil improvement, mulching and anything else they recommend to make your garden healthy and happy as organically as possible.
For inexperienced gardeners, choosing mulch can feel intimidating.
We’re here to help with the low-down on the best mulch for gardens!
Don’t have much time? Watch our video summary!
Best Mulch for Gardens
Mulch may be the magic silver bullet that takes your garden to the next level! There are so many benefits to mulching in your garden. It can:
retain moisture, reduce watering
protect plants during heatwaves
counteract dry, sandy soil
improve soil structure/nutrients
support seedlings
reduce soil erosion
attract friendly garden guests like bees, ladybirds and spiders for pest control/pollination
slow down weed growth creating a protective layer
recycle food/garden waste!
So, now you know why mulch is important! Now let’s choose the best mulch for you!
Wood Chip Mulch
Made from tree cuttings, wood chip mulch is a great “all-purpose” go-to.
Many consider it the best mulch for shrubs and trees, particularly fruiting ones. It looks good, is easy to lay, and is economical.
Do wood chips have a downside?
Some gardeners worry about “nitrogen drawn-down” — (wood chip mulch leaching nitrogen from the soil).
This fear is mostly based on urban myth — in fact, wood chip mulch increases soil nutrients. Minor nitrogen draw-down doesn’t affect deeply-rooted plants like fruit trees. However, avoid wood chip mulch for shallow-rooted plants like veggies.
Woodchip mulch safety tips
Woodchip mulch can be a fire hazard in some circumstances, especially given Perth’s high temperatures. Don’t layer it too thick — 2-10cm is ideal.
Store mulch in a cool, shady place, and check regularly to ensure it isn’t overheating. Avoid mulching thickly around tree trunks — in bushfire season this can be hazardous.
Shredded Pine Bark Mulch
This is our favourite – we think this is the best mulch!
Shredded bark mulch helps block weed shoots from sunlight, helps retain moisture, and enriches soil nutrients. Pine bark is also great for Perth gardens, it’s rusty red colour looks great, while it’s chunky cut allows water to get through to the roots, and it even helps improve the quality of the soil itself.
Bark nuggets last longer than wood chips, but their slow decomposition may attract carpenter ants so keep on top of pest control!
Tips for using shredded bark mulch
When spreading shredded bark, keep it away from tree trunks to avoid rot and rodent damage. Watch for extreme weather — strong winds, rain or flooding may mean re-laying mulch.
Which Mulch should you avoid? Black Mulch never gets our vote as the best mulch – some people choose it because they like the look, and it does create a great contrast, but it is very fibrous, which means it actually absorbs water, reducing the amount that will actually penetrate and get through to your plants. It also does very little to help improve the soil, and doesn’t last as long as Pine Bark.
Recycled Mulch
Recycled mulches are made from various materials, including recycled rubber or timber. They can lower your garden’s carbon footprint, so may be the best mulch for eco-conscious gardeners.
Pallet/timber mulch is long-lasting, retainsmoisture, and is usually eco-friendly. However, check how contamination is managed — it may be tainted by chemicals or toxins.
Rubber mulch repels pests, insects and weeds, and provides a ‘soft fall’ in play areas. It is long-lasting, won’t decompose and reduces mould/fungal growth.
Safety tip: some rubber mulch releases chemicals in hot weather. Look for a non-toxic brand.
Hay Mulch
Hay mulch is a well-kept secret we’re letting you in on…
Hay is grass cut while still green — it contains lots of moisture.
Many believe it’s the best mulch for flower and veggie gardens — it blocks weeds, and delivers nutrients to the soil as it composts.
This is especially good for seedlings.
How to use hay as mulch
Buy quality hay to minimise weeds. Ideally, spread hay approximately 20cm deep.
Lucerne hay
Lucerne hay is probably the best mulch for gardens with roses, fruit trees and vegetables. It provides extra nitrogen when decomposing.
Straw Mulch
Straw mulch is lighter than hay, so weeds come through more easily, but takes longer to decompose and looks better than hay.
Try combininghay and straw. Start with a deep layer of hay to retain moisture and provide nutrients. Top with a light layer of straw.
Leaf Mulch and Compost
Leaves can be a fantastic addition to other mulch.
You can shred dry leaves with your lawnmower and spread them on top of gardens, add leaves to compost or dig them into soil.
Grass Cuttings
Using grass cuttings as mulch is simple — after mowing, spread clippings across garden beds, then wait!
Grass mulch cools the root zone, conserves moisture, and restores nutrients, especially nitrogen.
Grass clippings can also be spread on your lawn to keep it healthy.
Rock and Gravel Mulch
We don’t normally think of rocks or gravel as mulch — but they can be!
Rocks and gravel:
prevent excess drainage and erosion
block weeds
create a classy look
last (almost) forever.
They:
cost less than organic mulches and
unlike organic mulch, will not attract insect pests.
Note: rock/gravel mulch will not enrich soil, is difficult to remove once installed, and harder to put new plants in.
How to use rock and gravel mulch
Rocks and gravel suit decorative formal gardens as they don’t decompose. They are often used where plants are permanently established.
Leave roughly a 5cm gap around the base of plants/trees.
To combine with other mulch, lay organic mulch first, then top with rocks!
BONUS MULCH TIPS:
Weed Mat
Weedmat isn’t technically mulch, but helps protect your garden from weeds and to retain moisture.
Ideal for fruit and veggie gardens, it can protect crops on vines like melons and pumpkins from decay.
For best results, place the weed mat between soil and mulch.
Compost
Compost is also important, but unlike mulch is dug into the soil to provide nutrients and hydration.
Compost can be made from:
fruit/vegetable scraps
coffee grounds
eggshells
grass/plant clippings
leaves
chipped wood/bark
shredded paper
straw
clean sawdust.
Ingredients are put in a compost tumbler, garbage bag or heap, to decompose. Water, ‘compost starter’ and regular turning all help the process.
The best compost is around three parts “dry”, and one part “wet”. If it’s too dry, add water, or wet ingredients like fresh grass. If too wet, add dry materials like newspaper or straw.
Health & Safety Tips When Handling Mulch or Compost
Wear a mask and gloves when handling organic/recycled mulch/potting mix, particularly for those with chronic health conditions. They can contain Legionella bacteria, fungal spores or toxins that may be dangerous if they are disturbed and become airborne.
Other safety precautions include storing potting mix and mulch where it’s cool, and washing hands thoroughly after use. To avoid inhaling particles, open bags carefully and keep mulch/compost damp.
As the weather changes, trees and plants can come under stress. During these times, it’s crucial to know how to take care of your precious fruit trees.
An important part of this is pruning your fruit trees.
For inexperienced gardeners, pruning can feel intimidating — once a branch is pruned, there’s no going back! However, it doesn’t have to be as scary as it seems.
As part of our regular garden maintenance services, we prune a lot of citrus and fruit trees in Perth, citrus fruit trees seem to be especially popular with our clients. So we thought we would provide a few tips on how to take care of them through proper pruning!
In this blog post, we’ll run you through some essentials you need to know to keep your fruit trees pruned, healthy and happy along with a few of our “garden geek” tips.
Why Should You Prune Fruit Trees?
Pruning your fruit trees is important to ensure trees stay healthy and happy. This is particularly true during winter for most types of fruit trees.
Essentially, the pruning process is about promoting growth for your trees. Branches that you cut back will re-grow, in turn encouraging the tree to produce more fruit.
Pruning also helps the tree’s general health and can make it more aesthetically pleasing.
Pruning trees helps to:
develop and maintain ideal tree shape and size
allow more sunlight into the centre of the tree
improve air circulation around leaves and branches
reduce the risk of disease
remove dead branches — these can harm the tree and become a safety hazard!
When Is The Best Time For Pruning Fruit Trees?
There are several types of pruning and many types of fruit trees. Pruning is recommended at different times of the year depending on the climate, why you are pruning, and the type of fruit tree.
In most cases fruit trees are pruned in winter, or early spring, when the tree is dormant (not actively growing).
Dormant pruning
In Perth dormant pruning is typically performed in the colder months (June to August).
This type of pruning aims to protect the structure of a mature tree, or help a young tree form a basic shape. It stops branches from crowding together or crossing over one another.
Dead, diseased or broken branches can also be removed. These are not just unsightly, they drain the plant’s energy!
Summer pruning
Summer pruning is often done around December in Perth, to keep vigorous trees to a manageable size.
Summer pruning is also useful to maintain a pleasing shape.
The other reason for summer pruning is that some types of fruit trees, like apricots and cherries, become more disease prone if pruned in winter.
During Summer pruning, you usually remove any suckers (shoots that grow low down on the trunk). These often grow as a response to compromised roots.
Cut them as low as possible to discourage reshooting. This helps to conserve the tree’s energy for more productive growth.
Inner-facing branches are removed to improve sunlight and airflow to the centre of the tree. Other branches can be shortened, both to balance the tree’s appearance and to prevent them getting too long and thin – these types of branches are prone to breakage when loaded with fruit.
Other seasonal preferences:
Citrus – prune tips all year round as needed
Figs – prune in winter
Apples and pears – deciduous trees are pruned while dormant
Grapes – prune hard in winter, trim in the warm months
The life cycle of a fruit tree
How often you should prune also depends on the age of the tree.
Pruning in year one is to form the tree’s shape and encourage growth. Trim the central trunk down to where there is an outward-facing bud, about 75cms above ground.
The next year remove inward-facing branches and lower shoots. Reduce upward shoots by half to allow for new branches.
By year three your fruit tree will have its shape. Cut the best branches in half – this strengthens the tree to carry fruit.
By year four you won’t need to prune heavily after fruiting. Large branches can be reduced by one-third and the top pruned to keep the height manageable.
After five years, pruning your mature tree once a year after fruiting is all that’s needed.
If you want to hand over the fruit tree pruning to the professionals, have a look at our tree pruning services and get in touch.
What Tools Do You Need to Prune Fruit Trees?
When pruning fruit trees, your main tool will probably be sharp secateurs. You might also use a tree lopping tool for larger branches, or a pruning saw if making major structural changes.
Before pruning, and even between pruning individual trees, disinfect the blades of tools you use with a solution of 1 part bleach to 10 parts water (don’t make it any stronger!)
This removes traces of tree sap and other contaminants, reducing the risk of disease being carried from tree to tree by tools.
How To Prune Fruit Trees — A Step-by-Step Guide
Now that you understand the “why” and have all the tools you need, it’s time to learn the steps to a perfect pruning.
Step 1: Clean Up the Deadwood
Firstly, examine your tree for branches that are dead or broken. These can be a hazard during extreme weather and a danger to your tree, encouraging disease and stunting growth. Cut these away to help your tree (and your property) stay healthy!
Step 2: Trim out Sprouts and Suckers
Your next step is to trim unnecessary growth like water sprouts and suckers.
Water sprouts are vertical growths caused by stress or damage — for example, from severe weather, soil compaction, drought, or disease.
Growing from dormant, buried buds in the bark, water sprouts appear on the trunk and branches of a tree, sapping the tree’s energy. They can ruin its shape, allowing pathogens and disease in and weakening an otherwise strong structure.
Suckers look similar, but grow around the base of the tree from the root system, stealing nutrients and ruining the ‘look’ of a tree. They’re also best removed to conserve the tree’s energy.
Step 3: Cut Back and Thin Out
At this point, it’s time to begin the main job.
First, thin out the branches of your fruit tree to allow more light and air into the canopy. This will help your tree produce more fruit!
Next, cut back any wayward branches running sideways, downwards or crowding over each other.
Step back and take a look at your tree. If branches are spaced out evenly and spreading out from the middle of the tree, then you’re golden.
If you can still see branches competing or crossing over each other, check if any are growing from the same spot or next to each other from different points on the tree.
In either case, keep the healthiest branch with the best angle from the tree (branches should sit at approx. two o’clock or ten o’clock position). Remove the weaker competing branch.
Finish up your thinning out process by giving all branches around 15-30cm of air space. (Smaller branches can be left a little closer together.)
Step 4: Topping and Skirting
Another aspect to pruning fruit trees is topping and skirting.
Topping
Pruning the top of a tree to make it easier to harvest from is controversial. It is best to only do this when necessary (for example to help a tree recover from storm damage) and if you are confident the tree can recover.
Topping trees can lead to unbalanced root-to-crown ratio, disturbing the tree’s ability to produce energy and photosynthesise. A tree may also be shocked by topping and grow erratically. These problems can lead to tree death.
Skirting
This is the process of cutting back branches hanging low to the ground. Well-developed trees should be skirted to about 75cm above ground level, leaving enough room for the branches to droop a little when bearing fruit, without dragging on the ground.
Step 5: Heading Back
Heading back is the process of shortening a branch or new shoot to encourage growth, and is performed on the outer edges of the tree. Think of this as giving the tree a haircut!
Heading back keeps a tree looking neat, and helps branches grow solid and strong.
For best results, cut back approx. 20-30% of last year’s growth — this could be anywhere between 5cm and 1.5m depending on the tree type and maturity.
FRUIT TREE PRUNING TIP
Remember, when pruning any tree it’s best to cut as close to the branch as possible!
Fruit Tree Pruning Shapes
For an extra special touch, shape your fruit trees in a way that suits the overall look of your garden. This will make your trees look well-cared for and give your garden a consistent aesthetic.
Natural
Natural shaping is a “hands-off” philosophy that says that a fruit tree will fruit quicker and more strongly if left without pruning. Those who are fans of natural gardening techniques may prefer this option.
Trees can grow very tall using this method, and fruit may be difficult to harvest. Suckers and sprouts may also become a problem.
Open Centre
The “open center” shape is best suited to stone fruit such as plum, nectarine, apricot or cherry trees. This may also be referred to as a “vase shape”.
Often, stone fruit will grow this way naturally to begin with — in this case, select three to five of the strongest branches as a foundation and prune away any branches that cross over or compete with each other.
If your tree is shaped differently, prune branches into the vase shape described by choosing the strongest branches as a basis.
Prune branches in a way that leaves open space at the centre of the tree — this lets in more light and allows for better airflow.
Central Leader
A central leader shape is where the central trunk or “leader” forms the basis of the tree’s shape.
The central leader is emphasised by pruning all branches on the lower section of the trunk. To achieve this, trim all branches from around 9m down to the soil level.
Whether you’re working out how to manage a lawn for the first time, trying to repair a neglected yard, or preparing to compete in Australia’s Best Lawn, we can help with the transformation!
In this blog, we’ll cover the basics of lawn mowing, then give some ‘garden geek’ lawn mowing tips to take your home turf to the next level!
Our Top Tips for How To Mow a Lawn
Many people mow their lawns on a standard setting and hope for the best, but if you’d like to keep your lawn looking great and staying healthy, we have some perfect tips for mowing the lawn.
Keeping on top of your lawn care means no more wild, overgrown grass that chokes your garden, no more scalping or dead grass — you can feel good about your yard and know you’ve done everything possible to keep it healthy.
Here are our top 20 lawn mowing tips to help your lawn stay picture-perfect.
1. Plant wisely
Choose the right grass type for your garden’s aspect and soil type (turf farms provide great advice on this).
Once lawns are established, avoid cross-contamination. For example, if your footpath is Kikuyu but your back lawn is Couch, clean your mower between mowing each area, as some grasses are easily transported and can take over.
2. Water with care
This is crucial: water well so your lawn can thrive.
Choose the right time! Watering during the heat of the afternoon risks burnt grass. Watering at night can cause disease. Morning watering between 6am-9am in moderate temperatures gives the best results!
New lawns require frequent watering.
Most lawns can be watered 2-3 times a week in warm weather, once established. Drought-tolerant grasses need less water.
3. Take Your Time
Our first lawn mowing tip is simple: take your time!
Rushing mowing can lead to missed patches or over-mowing. Keep your mower at a medium setting. For tricky spots like corners or borders, go slow and steady.
This keeps your lawn looking well cared for, and reduces strain on your lawn mower.
4. Maintain Your Lawn Mower
This simple step is often neglected. Service your lawn mower regularly (or have someone service it!) This reduces the chance of it breaking down unexpectedly.
A mowing schedule is important to keep your lawn looking its best. You can’t stick to a schedule if your mower is out of action!
To service your mower:
clean the body (brush and soapy water) and small engine components (degreaser)
clean air filters to remove dirt/buildup / replace when necessary
check/replace oil in four-stroke lawn mowers — (check oil, refill if needed, replace annually)
top-up fuel — check there’s enough for a full mow
drain andreplace fuel monthly
check pull-cords, replacing frayed or stretched cords
keep lawn-mower blades sharp.
Dull blades tear grass instead of cutting cleanly — ends can then become brown and unsightly. Blunt blades can also rip holes in the lawn!
So how do you know whether to sharpen blades or replace them? First, check for damage. Replace bent blades and any with nicks, or cracks – where blades are just dull, sharpen them.
5. Avoid Mowing a Wet Lawn!
If you’ve watered recently or it has rained, let the grass dry before you mow — mowing a wet lawn can damage the lawn and your mower!
Clumps of wet grass can clog mower blades, the grass can tear and go brown, and lawns can be exposed to disease.
6. Trim Your Edges
Trimming edges can give your lawn a polished, well-cared-for aesthetic.
First, create a straight line to guide you — use a plank, or twine and pegs.
Where edges are overgrown, use a half-moon edger to cut dense growth. Grass shears are perfect to reach tricky spots, then whipper-snip edges to create a precise border.
NOTE: always wear safety glasses, ear protection, long trousers and enclosed shoes when using a whipper-snipper.
Check which way the wind is blowing, and cut in the opposite direction to avoid blowback.
7. Adjust the Cutting Height on Your Mower
Always adjust the cutting height to suit your grass type and weather before you mow.
If you need to change this, turn off the mower by unplugging (electric mowers) or turning off the engine (petrol mowers).
Before adjusting height, allow the mower to cool down.
On many electric mowers, blade height is adjusted via a single lever. Petrol models often have a lever between each tire and the deck. For specific suggestions, check your instruction manual.
8. Consider Your Grass Type
Many people just cut their grass on the default setting whenever they have time and hope for the best!
To take your lawn care up a notch, work out the optimal timing and blade height, based on grass type and season.
There are four main lawn types in Western Australia — Buffalo, Zoysia, Kikuyu and Couch. The first three are the most popular. Each is cared for slightly differently — we offer our ideas on this, but recommended methods vary.
Buffalo grass: cut to 20-50mm in sun, 50-70mm in heavy shade. Mow weekly in warm weather, every 3 to 6 weeks in winter.
Zoysia: cut to 20-50mm in sun, 50-70mm in shade. Mow fortnightly in warm weather, every 3-8 weeks in winter.
Kikuyu: cut to 25-50 mm. Mow weekly in warm weather, every 3 to 6 weeks in winter.
Couch grass: cut to 10-25mm in sun, 15-35mm in shade. Mow twice a month in summer, monthly in winter.
9. Don’t Cut Lawns Too Short
Too-short grass goes brown and patchy. For a lush green lawn, don’t cut more than two-thirds of grass length at a time.
Cutting grass extra-short to save mowing so often may seem efficient, but the grass will become stressed, wilt, and be vulnerable to pests and weeds. Then it’s more work to repair the damage!
So how short is too short? In WA, don’t cut your lawn shorter than 20mm because of the heat and sandy soil.
10. Double Cut an Overgrown Lawn
Grass left too long without mowing grows inconsistently, with some areas taller than others.
Tall lawns can go to seed, leaving them looking more like an overgrown garden of weeds!
Here, double-cutting is the answer — mow your lawn in two separate sessions to reduce length. This gives your lawn a chance to recover. Remember, never reduce grass height by more than one-third in one session.
11. Stay Safe
Don’t Mow In Full Sun
Mowing in the heat of the day is bad for you and the lawn! Mow at cool times of day to avoid your lawn becoming heat-stressed.
Take Care On Slopes
If your lawn slopes, be extremely careful.
Mowing upwards on a hill with a self-propelled mower can be dangerous. The mower blades are facing you – if you slip or fall the results could be disastrous.
Mow downhill, go slowly and don’t stop on the slope if you can avoid it.
Steep hills are tricky on a ride-on mower, particularly if mowing parallel to the hill. Mow perpendicular to the hill, moving downhill slowly.
NOTE: Never take risks on steep slopes. Check the angle of your hill using an inclinometer (available from gardening shops or as a phone app.) Any angle greater than 15° is too risky.
12. Don’t use chemicals right before mowing
Insecticides and chemicals can damage your lawn mower, your grass and the environment if used carelessly, or right before mowing.
13. Don’t Cut Newly Sown Lawn
When you plant a new lawn, it is tempting to mow it as soon as it grows. Don’t! Your lawn needs time to grow strong roots and blades — this takes about 3-4 weeks.
Let your lawn grow a little higher than usual at first (usually 40-60mm). Mowing too soon causes ‘scalping’, leaving wheel tracks and torn patches.
Just as we live differently from season to season, our lawns change too!
Summer Lawns
Warm-season grasses common in WA like Buffalo, Zoysia, Kikuyu and Couch like to be cut a little shorter in summer. However, to avoid scalping/patchiness, don’tremove more than one-third of the length.
Heat stresses grass, so give your lawn more TLC in summer. Fertilise and water well early.
Autumn Lawns
During autumn, reduce mowing frequency. Let lawn length increase slightly for more surface area to soak up sunlight. This strengthens grass in preparation for winter.
Fertilise around Easter — there’s still enough sun for fertiliser to give your lawn a boost, and sustain it during winter.
Winter Lawns
In winter, aerate your lawn so oxygen and water can reach the roots. Do this yourself with aeration boots or buy/hire an aeration machine.
For smaller lawns, aerate by digging a garden fork into the lawn every few centimetres and tilting it.
Spring Lawns
All grass types need fertiliser in spring to recover from Winter and prepare for Summer. The best fertilisers also suppress weeds.
We also recommend pesticides to tackle insects, and dethatching to remove excess dead grass-runners.
Note: This information focuses on warm-season grasses grown in Perth and most of WA. Cool-season grasses, usually only used in southernmost WA, are managed differently. Information on these is readily available online.
15. Get Creative with Cut-In Patterns
We all love a natural-looking lawn, but ‘lawn stripes’, diamonds, zigzags and other decorative patterns really make a lawn stand out!
Patterns are created by cutting and rolling lawns geometrically. Bends in the grass then reflect light at different angles.
Here are our lawn mowing tips to help you to create fantastic patterns.
Grow your lawn taller.
Use a guide like your driveway to cut in straight lines.
Buy a striping kit to roll grass.
Fertilise/re-seed for an even more striking effect
16. Grass Clippings as Mulch or Compost
Don’t throw grass clippings away! Clippings make great mulch or compost.
Lay clippings around 6mm deep as mulch, or combine with brown material for a fast, high-nitrogen compost.
When the lawn needs only a light trim, leave dry clippings on the lawn as a natural fertiliser.
17. Lawn Edging
Lawn edging gives a finished look, stops grass from invading gardens, and can make your lawn the envy of neighbours…
Bricks are a popular edging. Other options include prefabricated concrete, plastic, metal or timber, or spade-cut edges.
Whatever your choice, edging will look tidier and separate lawns from garden beds.
18. Eco-Friendly Lawn Mowing
If eco-friendly gardening is important to you, a manual, battery-powered, solar or electric lawn mower can eliminate fumes. This healthy choice helps reduce pollution.
19. Help Damaged Grass Recover
Be generous with water, and try mowing in different directions each time you mow, to avoid wheel ruts. Raise the mower-blade height a little to help the lawn recover from drought, disease or insect damage.
Topdressing is a great way to help patchy or uneven lawns recover, read here for more tips on topdressing your lawn.
20. Make Life Easier
If you don’t love pushing a lawn mower, there are other options.
Automatic self-propelled mowers are easy to use. Ride-on mowers allow you to sit while you mow.
Robot lawn mowers mow your lawn automatically (like a Roomba)! They handle slopes, are smartphone compatible, and mow when it suits you.
While we don’t offer this within our gardening packages, this is a question we often get asked so hope this blog is useful to you!
What is thatch?
Thatch is a build-up of organic matter which forms a layer under the blades of grass but on top of the soil.
During the warmer seasons of Spring and Summer, the thatch is usually made up of runners, living and dead, as well as other organic matter such as leaves and lawn-clippings. In the cooler seasons, thatch is created from dead and dying organic matter.
Read on for why this can be a problem, and what to do about it.